Showing posts with label Cake. Show all posts

Sunday, 30 August 2015

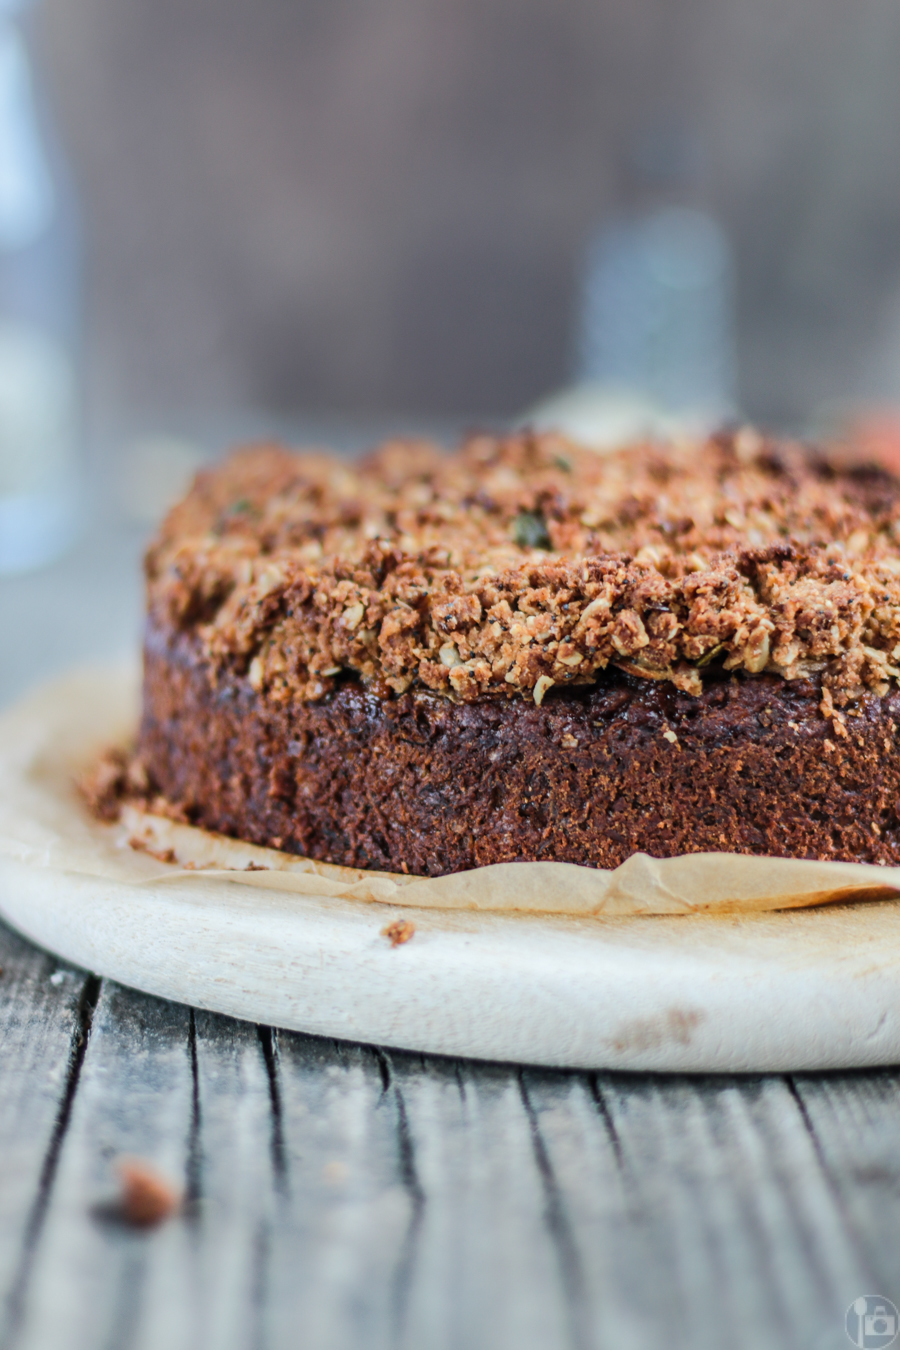
Harvest Cake {w/ zucchini, beetroot, carrot & apple}

Cake with Zucchini, Beetroot, Carrot and Apple - perfect for the Harvest/Thanksgiving season

My arms are becoming really strong lately. And no this isn't thanks to some super secret training method which transforms you into a human version of the incredible "Hulk"overnight but rather because of all the fresh vegetables our allotment harvest brings us. Zucchini, potatoes, herbs, beetroot, carrots, spinach, beans, pumpkins - you can almost see the crops growing. Our vegetable box is overflowing from all the goodness and even with the combined "eating powers" of friends and family it seems like we can't conquer the masses of fresh produce ;-). So as every year it's veggies 24/7 - no complaints - zucchini pancakes are a great breakfast btw.

Cake with Zucchini, Beetroot, Carrot and Apple - perfect for the Harvest/Thanksgiving seasonCake with Zucchini, Beetroot, Carrot and Apple - perfect for the Harvest/Thanksgiving season

It's kind of a tradition for me to bake a cake or bread with some of the fresh produce (e.g. this Zucchini and Thyme Bread  or these baked Beetroot Chips) and this year I just combined a bit of everything: zucchini, beetroot, carrots plus apples, a hint of cinnamon and the usual suspects flour, fat, salt etc. plus crumble - you can't go wrong with crumbles.

Cake with Zucchini, Beetroot, Carrot and Apple - perfect for the Harvest/Thanksgiving season

Monday, 24 August 2015

Rhubarb & Hazelnut Upside Down Cake

Vegan Cake Crumbs

Current mood: bucketloads of good coffee in the morning or whole pints of English Breakfast w/ milk in the afternoon... and warm cake, biscuits, muffins or anything freshly baked and wholesome-ly sweet. Pre-autumn blues? Maybe.. rainy and grey german weather? Definitely.

Rhubarb & Hazelnut Upside-down Cake

Clouds, white clouds, grey clouds, dark clouds, small clouds and the sun - they seem to be playing catch me if you can on the canvas of the sky. The current breeze will change into a strong wind short before you notice. And as soon as I'm ready to wave goodbye to Summer and wipe the dust off my boots and sweaters the forgotten summer sun rays break through again - humidity, warmth, heat and short shorts all over again. Sounds like April heh? So to keep a bit of these end-of-summer-but-could-be-spring feels I've mixed some colorful end-of-the-season-rhubarb with a few nuts - fresh and wholesome yet perfect with a huge mug of tea instead of an iced latte. Enjoy these pre-autumn days!

Rhubarb & Hazelnut Upside-down CakeRhubarb & Hazelnut Upside-down Cake

Rhubarb & Hazelnut Upside-down Cake

 Rhubarb & Hazelnut Upside-down Cake
- makes one regular sized loaf cake, double the amount for a measurements for a regular-sized springform pan
- 200g fresh or thawed rhubarb, peeled and cut into large chunks (max. 2 inch long)
- a handful of Hazelnuts, blanched
- 150g natural full-fat Yoghurt (3.5%), or non-dairy if necessary
- 60g plus 2 Tbsp coconut oil, alternatively use butter or vegan spread
- 90g plus 5 Tbsp Honey
- 1 tsp Cinnamon
- 1/2 tsp Salt
- 1 tsp Vanilla
- 220g flour (I used whole spelt, but all-purpose or whole wheat works equally fine)
- 1 and 1/2 tsp baking soda
- 1/2 Tbsp white vinegar
- 60 ml milk, use non-dairy if necessary

1. Mix the rhubarb with 3 Tbsp honey and heat in a small saucepan until slightly softened while interior is still firm. Alternatively heat it in a covered bowl in the microwave for 2:30 minutes on high-heat.
2. Pre-heat your oven to 175°C. Toast your hazelnuts on a baking sheet for 10 minutes until slightly browned. Meanwhile beat the yoghurt, 60g coconut oil and 90g honey on high for two minutes. In a separate bowl mix all dry ingredients. Pour vinegar and milk over the batter and lift in the dry ingredients briefly until just combined.
3. Melt the remaining 2 Tbsp Coconut Oil, mix it with the honey and spread that onto the bottom of your pan. Drain the rhubarb and put it into the bottom of the pan. Sprinkle the hazelnuts on top and cover with the batter.
4. Bake for 30-40 minutes until a skewer inserted comes out clean. Enjoy!

Rhubarb & Hazelnut Upside-down Cake Close Up


Friday, 3 October 2014

Pear & Double Almond Upside Down Cake {One year blogiversary}


Okay, so a year ago today I spontaneously decided to finally listen to my mom's advice  (yes, there's a lot of truth behind that saying suggesting that moms are always right, even when that can be hard to accept sometimes... Just kiddin' - love you mom!) and finally started a food blog. Random site note: I did this a day before an important exam, yep that's right, should have been studying, nevertheless got that really good grade in the end - take time for what you love, happiness is key, lesson learned! Last year's third of october was a moody rainy day in Germany - perfect for this loaf shaped Zebra cake! During the year you might have noticed my love for streusel/crumbs and upside down cakes (an addiction that I just got to through blogging) - if you're a first time visitor then feel free to take a glance at the blog's recipe index and you'll possibly agree with me! I decided to stick to the tradition and the essentials so today there's a cinnamon spiced pear upside down cake with a whole lot of caramellized almonds on top - all those autumn flavours packed into one piece of cake!


But back to the story, because birthdays make me nostalgic - I basically spent the whole day working on that blog design, layout etc. to have it up and running within a couple of hours (screw those characterisations and stuff that should've got in my head..) Going for color or black and white in the design seemed like the most important question to be answered :-P. In the end I settled for a colorful one - which got changed from orange/yellow to blue/grey/yellow during the last 365 days! 


Oh and what an adventure those have been! My personal life got turned complitely upside down: graduating high school, a lot of adventurous travels and now I'm sitting in my bed in the big capital of the UK, ready to fill up the next 365 days of blogging with trumendous stories from my Au pair year and of course: food. All the food - 'cause that's why you are here for! Summary: happy Birthday A Spoonful of Photography - thanks for being my creative outlet and thanks to/for all those amazing people that i was able to meet online through you during this year, the ones who support me and the ones who i would call a friend already! Cheers or moreover happy cake devouring!

Pear & Double Almond Upside Down Cake with caramellized Honey Almonds
-makes one regular loaf sized cake
- For the Pear layer:
- 2 medium sized pears
- 4 Tbsp butter
- 3 Tbsp brown sugar
- 2 tsp cinnamon

- For the crumbs:
- 60g butter
- 120g flour
- 35g sugar

- For the cake
- 100g butter
- 80g brown sugar
- 2 eggs
- 3 Tbsp honey (may be substituted with three heaping Tbsp of white sugar)
- 1/2 tsp salt
- 1/2 tsp baking soda
- 1 tsp baking powder
- 3 Tbsp ground cinnamon
- 200g flour (I used Whole wheat)
- 170g ground almonds
- up to 100 ml milk
- 1 Tbsp white vinegar

For the caramellized honey almond topping:
- 80g whole almonds, blanched if you prefer that
- 30g brown sugar
- 1 Tbsp honey
- optional (even though highly recommended!): 1/2 tsp salt, 1 tsp cinnamon


1. Preheat the oven to 175/350.
2. Prepare the pear layer: melt the butter and grease a regular sized loaf tin with it. Mix together the brown sugar and cinnamon and dust the bottom and sides of the pan.
3. Wash and slice two pears as thinly as possible (you should be almost able to look through them) layer the slices upside down in the pan so they'll be right side up again once the cake get's inverted.
4. Prepare the crumbs: work together the butter, sugar and flour until a dough starts to come together, loose it with a fork into fine crumbs and set aside.
5.Prepare the cake batter: In a medium sized bowl beat together the  butter and brown sugar for about 2 minutes until creamy.  Seperate one egg. Add in the remaining egg, plus the egg yolk to the butter-sugar mixture and beat throughoutly.
6. In a seperate bowl mix the flour, cinnamon, baking soda and salt. Divide the butter mixture into three equal parts, briefly lift in the flour mixture into two of the butter parts, do the same with the ground almonds and the remaining butter part. Divide the milk amongst the two batters, you might need a little more until you've got a rather thick consistency which is supposed to ribbon off the spatula. Beat the egg white until stiff peaks form and fold it into the almond dough.
7. Pour half of the flour batter on top of the prepared pears. Press down the middle a bit and fill it with the almond batter, then cover it with the remaining flour batter. Bake for 45-60 minutes, until a skewer or cake tester inserted cones out clean.
8. Remove from the oven and let cool for 10 minutes, then carefully run a knife arount the edges to loosen the cake (use a sharp and thin blade to not destroy the pears). Invert on to a plate and remove the pan. Let cool for a further 15-20 minutes.
9. After the further cooling prepare the honey almond topping: put the whole almonds into a pan and roast them for 2-3 minutes on medium high heat until slightly browned. Then add in the sugar and honey, reduce stirring to a minimum until the sugar has caramellized (this will take about 3 minutes on medium high heat), in the last second stir in the cinnamon. Pour on top of the cake, carefully seperate the almonds with a fork, to allow for easier cake cutting later. Let sit for 5 minutes, then either serve immediately or keep it in the refrigerator for up to 3 days wrapped in aluminium foil. Enjoy!


Thursday, 25 September 2014

Super-crusty Apple pie


My new running track in London goes right around one of the many beautiful green parks here. For most people this would rather be called a forest though, but I think "park" just sounds more british or sophisticated (in a good way!). And at one point I pass a beautiful small apple tree - it's not actually that huge or big old apple tree like, but it's like a miraculous spot right in the middle of an already magic area. I don't think I'll have to start much rambling about how much I love apples or apple trees - but as soon as the green gems start to get some colour going and urge to be picked I won't wait long to take the call!


We actually picked a lot of feral apples on a family trip to southern Germany back in August. And what do you do with all the apples? You may have guessed it: BAKE. SOME. CAKE. Sorry for being so direct with my point, but if you've got some buttery crust with juicy sweet apples - what's not to love? You don't aaaalways have to be as fancy and put them in a chocolate cake like here or sprinkle them into muffins like this - sometimes a simple and quick cake is all you need to go with your afternoon cup of coffee or tea. To remind you that simple things own some magic as well and that you can find it if you only let the magic in.


In this way, get your oven going and put those apples out there to a good use - happy baking everyone! :)

Super-crusty Apple Pie
makes one pie, 20 cm in diameter
For the filling:
- 6 apples, I used tart feral ones
- 3 Tbsp sugar
- 2 Tbsp cinnamon
For the crust:
- 250g butter
- 180g sugar
- 1/2 tsp salt
- 2 eggs
- 350g whole wheat flour
- 2 Tbsp cinnamon
- 3 Tbsp milk
For serving, optional:
- 200g whipping cream, whipped to desired consistency and optionally sweetened

1. Peel the apples and cut them into small cubes, mix with the sugar and cinnamon.
2. Preheat your oven to 175 °C/ 350 °F. In a medium sized bowl beat together the butter and brown sugar for about 2 minutes until creamy. Mix in the eggs, then work in the flour, cinnamon and salt.
3. Grease or line a 20 cm pan with parchment paper. Spread one half of the crust dough onto the bottom and the sides of the pan. Drain the excess liquid from the prepared apple filling and layer the apples onto the prepared dough. Top with rough pieces of the remaining dough and glaze with the milk.
4. Bake your pie for 45-60 minutes until crust is slightly browned and apples are fully cooked.
5. Remove from the oven, let sit for 10 minutes before removing from the pan. Best served warm with a generous dollop of whipped cream Enjoy!


Monday, 1 September 2014

Caramellized Cheesecakes - upside down


What do you do after school? Like seriously once you've graduated..? It feels like the whole wide world is open to you, which is the exciting side but then you may also doubt how some decisions can narrow your future possibilities (don't get me wrong here, I believe in the possibilitiy of 180° turns yet some people tell you different...).  So, I've graduated this summer and what's up next?


For the past four to five years I always knew that going abroad was what I wanted to do next. Over the years the idea of a gap year in an english speaking country took shape and was finally fixed a few months ago. As you read this chances are that I'm already in the capital of the UK as an au pair and can't waitto see what this year's got to offer!

Because I'm not the only one out of my close friends who is spending some time away from home, there's been quite a marathon of last-get-togethers and goodbye-parties, huh, they've been great and sad at the same time...

But let's draw the line straight to these caramellized upside down cheesecakes before I get to nostalgic - they were a paty favour thus I baked them in small individual muffin tins, but you can as well do it in one pan, just remember to increase the baking time! In a ranking they would achieve a "my-sister-almost-ate-all-before-I-could-bring-them-to-a-party"-voting. Good because that means that they're irresistible and an ironically good kind of bad, because they might disappear before serving time.

Judge whichever way you like, just make sure that you bake them - easy preparation and when you choose the muffin tins, they're on the table in less than 45 minutes! So happy baking everybody!


Caramellized Cheesecakes - upside down
- makes 15 individual sized cakes or one regular sized one
For the crust:
- 150g flour
- 100g butter
- 40g sugar
- 1/2 tsp salt

For the cheesecake:
- 500g cottage cheese
- 200g cream cheese
- 1 egg
- 60g sugar

For the caramel:
- 5 Tbsp Butter, melted
- 4 Tbsp brown sugar
- optional: 1 tsp cinnamon

1. Prepare the dough for the crust, by working all the ingredients together, set aside.
2. Preheat your oven to 160°C/320°F. For the cheesecake filling mix together both cheeses and the sugar, then stir in the beaten egg.
3. Mix the sugar with the spice, when using. Brush the bottom of your pan(s) with the melted butter, sprinkle with the sugar, then divide the cheesecake mixture on top or spoon it on all at once, when using just one pan.
4. For the later-to-be-bottom divide the crust dough on top just like a crumb topping.
5. Bake for 20-45 minutes depending on pan size. Remove and let cool for 15 minutes before inverting the cake(s) onto a plate. Allow for further cooling and enjoy!


Sunday, 24 August 2014

Spiced Chocolate Cake {vegan, refined sugar free}

Spiced Chocolate Cake

This week's been all about back-to-school - me celebrating the fact that I can stay at home and my sister fighting the fact that summer break is over and it's all back to 7 am mornings and homework afternoons... Let's pretend that I was just a LITTLE malicious - but hey, I'm a good sister, so I made her some cake: a super-duper light vegan spiced chocolate cake with a sticky glaze - half for her to take to school, half for me for lazy breakfasts for the next days - sounds like a good deal doesn't it?

Spiced Chocolate Cake

I hid the fact that there's no white sugar in it from her, this was a fault: no more cake for me in the end - I just found a few crumbs, the rest was GONE! I don't think you need any more descriptions about how good this cake is, don't you? Even my mom was like, this cake that you just made was goooood, could you make it again for the weekend? Uhm, yes I will, just let me have a few more slices this time, please! ;-)

Spiced Chocolate Cake

Just a few hints to convince everyone about it (yes, even those who think that there can't be a cake without white sugar, trust me there is!): it's a melt in your mouth texture, light and chocolatey with a hint of various spices, reminders of autumn that's just starting. And it's all topped with a smooth glaze that incorporates even more chocolate - without being to rich and even skipping the sugar coma. Aaaaan there's zucchini inside! Call me crazy but it works, moist like nothing else! What's not to love? Have a happy weekend everyone and how about making some cake? :-)

Spiced Chocolate Cake {vegan, refined sugar free}
- 220 g or 1 and 1/2 cups shredded zucchini, can be substituded with carrots
- 200g or 1 and 2/3 cups flour (I used whole wheat)
- 1 tsp salt
- 1 and 1/2 tsp baking soda
- 1 and 1/2 tsp cinnamon
- 1 pinch cloves
- 2 tsp ground ginger
- 1 tsp ground cardamom
- 1/2 tsp coriander
- 3 Tbsp oil
- 75 g or 1/3 cup unsweetened applesauce
- 150g or 2/3 cups molasses
- 70g 99% Chocolate, you can use one with lower cocoa percentage, just make sure to adjust the molasses level accordingly!
- 50 ml or 1/5 cup water
- 1 and 1/2 Tbsp white vinegar

1. Preheat your oven to 180 °C/ 356 °F. Line a 20 cm/ ~ 8 inch springform pan with parchment paper.
2. In a medium sized bowl mix the shredded zucchini, flour, salt, all the spices and the baking soda.
3. Melt 50g of the chocolate, mix with 100g molasses and oil and stir into the dry ingredients until well combined. Now add in the water, applesauce and white vinegar, add in some more water if dough is too dry.
4. Pour the batter into the prepared pan and bake for 30-40 minutes until a skewer inserted comes out clean. Remove from the oven and let cool for 15 minutes.
5. Now prepare the glaze: melt the remaining chocolate and mix with the remaining molasses, then pour it over the still warm cake. Remove from the pan and let cool to room temperature, then slice and serve or keep in an airtight container until ready to serve. Enjoy!

Spiced Chocolate Cake

Saturday, 14 June 2014

Lemon Crumb Loaf

Lemon Loaf Cake with Crumbs

When life gives you lemons make lemon cake. Doesn't it says like that?

Not that I don't like lemons - I actually enjoyed eating the tangy fruit flesh since being a kid ;-).
But life indeed seemed to have been a little mad 'round here. First we had to return from one of the most beautiful yet much to short summer holidays in Croatia to an incredible humidity. The bittersweet relief from it came in form of an incredible thunderstorm monday night. The extent just got visible over the past days - they say almost every fourth tree has been demolished, not even giving numbers of ruined rooftops, windows that have been smashed into pieces by flying roof tiles as well as cars buried under tree trunks. It's been crazy!! At least busses, trains and trums started working slowly again.

Lemon Loaf

Nevertheless we have been gifted with beautiful sunny summer weather afterwards (like you can see in the photo above - beautiful sunshine, I didn't mined the rule of "use a diffusor while shooting" ;-)) and somehow summer weather always has me craving lemon-y fresh cake. I could go crazy for the classic lemon loaf cake with a thick sugary drizzle - theres just one little thing that makes it a bit more better (if that's even possible..) CRUMBS!

You know, for me crumbs/streusel makes everything better ;-) Sandwiched between the crumbly lemon cake and the smooth lemon drizzle the combination is to die for! The addition of italian Ricotta not only takes away the butter-y heaviness that you might end up with sometimes, it also boosts the lemony-light taste and adds a nice creamy texture to the drizzle! So, even when life doesn't gives you lemons, make this rustic beauty for the sake of summer feelings!! :)

Lemon Cake with Crumbs

Lemon Streusel Loaf Cake

Lemon Crumb Loaf
- makes enough for one regular sized loaf pan, about 12-15 individual servings
For the Crumb:
- 50g Sugar
- 1/2 tsp Salt
- 200g Flour (I used Whole Wheat)
- 130g Butter

For the Cake:
- Zest and Juice of two Lemons
- 90g Butter
- 120g Sugar
- 2 Eggs
- 120g Ricotta
- 1 Pinch Salt
- 270g Flour
- 1 tsp Baking Soda

For the Drizzle:
- 2 Tbsp Lemon Juice
- 100g Ricotta
- 30g Caster Sugar

1. Make the Crumb by working together all the ingredients with your hands until a dough comes together. Leave in the refrigerator to rest.
2. Meanwhile preheat your oven to 175°C/350°F. Grease and line a pan with parchment paper. In a medium sized bowl make the cake: beat together the lemon zest, butter and sugar until airy, about 2 minutes. Add in the eggs, ricotta and lemon juice - beat until just combined. Then briefly fold in the salt, flour and baking soda until all ingredients are well mixed.
3. Pour into the prepared pan. Take the crumb dough out of the refrigerator and distribute it into small crumbs. Sprinkle on top of the batter. Bake in the preheated oven for 45-50 minutes, until a skewer inserted comes out clean.
4. Take out and let the cake cool in the pan for 10 minutes, then remove and allow to cool for a further 10 minutes. Meanwhile prepare the drizzle by beating together all ingredients until smooth, then poor over the cake when it's ready to be served. Because of the ricotta in the drizzle cake is best to be kept in the refrigerator for up to 3 days. Enjoy!

Saturday, 3 May 2014

Berrylicious Buttermilk Cake

Berrylicious Buttermilk Cake

Hey guys, let's meet the "BBC" (no, not the channel, 'cause this is a food blog after all, even if their recipe section might be well worth a check..) but I am actually talking about this beauty:

Berrylicious Buttermilk Cake

A Berrylicious Buttermilk Cake! It's a super soft, melt in your mouth kind of cake with an airy texture thanks to the buttermilk, which really gets to shine as it is paired up with fresh early summer berries. The perfect go-to snack cake which can just sit on your kitchen counter like it's no one's business and then blow off everyone's mind with it's taste and texture.

Saturday, 12 April 2014

Rhubarb Magic Cake


One Batter, seperating into three layers: soft, melt-in-your-mouth cake on top, a thick custard in the middle and a thin cake layer on the bottom - this is what makes up the magic custard cake/pie.

Now it's already fabulous on it's own already but imagine pairing it up with some speckles of fresh rhubarb, cooked with a little brown sugar and cinnamon: magic cake perfection!


I've had my veeeery last day of school yesterday, eight years of grammar/high school have passed really fast and the past months have been an emotional roller-coaster between total euphoria and depressional moments - happiness about starting into a self-determined post-school life while yet leaving the structure that was well known for years. But hey, that's life and I'm all in for the great moments that are ahead once the missing exams and viva voce are done and once I (hopefully and finally) hold my leaving certificate in my hands.


But back to the cake, before I am boring you with my inner mindset about studying all the stuff of the past two years...
Magic days call for magic cakes and thus this one was created, based on the awesome version from the White on Rice Couple which can be found here.
I've used a little less sugar and obviously added in the rhubarb which gives the cake a nice fruit-y and spring-y accent. The thick custard layer is incredibely light which makes this recipe perfect for the warm days - bake it a day before serving, leave it in the fridge over night and you're ready to go the next morning/day (And btw will be the hit of the party when you tell them that this cake is made out of just one batter!)! No rhubarb? No problem, just switch it up with some berries, apples or pears according to your liking. I've also seen chocolate chips being added in in some places ;-). Now try it out on your own and be surprised by the magic that can happen in your own oven! Hope you all are having a nice start into the spring break/easter holidays - take it slow (bake some cake ;-)) and enjoy the days off with family and friends!

Rhubarb Magic Cake
adapted from this recipe by White on Rice Couple, yields one 8x8 inch cake
- ~400g Rhubarb
- 1 Tbsp Brown Sugar
- 1/2 tsp Cinnamon
- 115g/ 1/2 cup Butter
- 480ml/ 2 cups Milk
- 4 Eggs
- 1/2 tsp Vinegar
- 100g/ 1/2 cup minus 1 Tbsp Sugar
- 1 Tbsp Water
- 120g/1 cup All-purpose Flour

1. Wash, peel and cut the rhubarb into cubes. Mix it with the Brown Sugar and Cinnamon. Then either heat it in the microwave on high for 2 minutes or in a small saucepan on medium high heat for 5 minutes until soft yet not falling apart completely. Set in a fine sieve to drain off most of the liquid and set aside to cool down.
2. Preheat your oven to 325 °F/ 160°C. Grease or line an 8x8 inch pan with parchment paper. Melt the butter and set aside to cool.
3. Warm up the milk until warm to the touch.
4. Seperate your eggs and whip up the egg whites with the vinegar until stiff peaks form.
5. Beat together the sugar and egg yolks, then add in the butter and water and continue beating until well mixed for 1-2 minutes.
6. Quickly add in the flour and then carefully beat in the milk until well incorporated.
7. Carefully fold in the egg whites (I've done this in two batches, the original recipes calls for adding it in 1/3 at a time).
8. Slowly pour the batter into the prepared pan, then sprinkle the rhubarb on top and bake it for 50-60 minutes until the top is golden brown and a skewer inserted comes out with just some custard attached. Take it out and leave it to cool in the pan for 30 minutes, then put it in the refrigerator for at least 1 hour to overnight. Enjoy!

Saturday, 22 March 2014

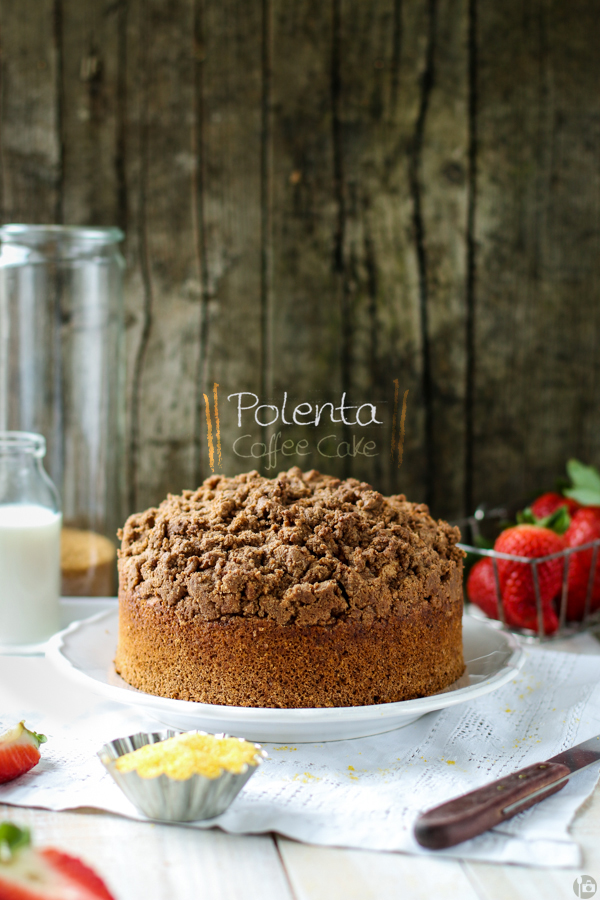
Polenta Coffee Cake


Some days just require cake. And no, I'm not even talking about this one special day once a year in someone's life where you can smash your face with all (ALL) the cake you get your hands on and end up in bed with a total sugar shock in the end... No, I'm talking about those wonderful weekends when all the weather has got in mind is soaking the nature with rain and you can decide to make a cozy home-and-pjs-all-day day.


This is what was going on here and to make staying at home even more reasonable a sore throat came along - because being sick in the middle of the exam period, who cares?
So rainy weather and flu symptoms call for hot beverages, a lot of them. But because the rest of the family was feeling really well and active they requested cake. And not just any cake: an especially light yet sinful one with crumbs and perfect to serve with a huge latte was what my sister begged me for. So I thought (okay, not really, it literally took me about 2 seconds to come up with this cake idea), turned out the ingredients, mixed and an hour later we got to sit down with coffee and a Polenta Coffee Cake with some (not so) optional Cinnamon Streusel - total comfort when still a little warm and without most of the guilt.


I'm still a little sick right know, so my brain's all like blaaaaaaaaah which is why I'll stop at this point with stories about my daily life and just let you devour into the pictures and then -of course - let you have some cake! Have a nice (and hopefully not that rainy and sick) weekend everyone!

Polenta Coffee Cake
- makes one 9"inch cake
For the crumb:
- 3/4 cup and 1 Tbsp /100g flour (I used whole wheat)
- 1/4 cup and 1 Tbsp/66g butter
- 1/8 cup/ 30g brown sugar
- 1 and 1/2 tsp cinnamon

For the cake:
- 1 and 1/3 cups / 160g whole wheat or all-purpose flour
- 1/2 cup/60g polenta
- 1/2 cup minus 1 Tbsp/ 100g sugar
- 1 Tbsp honey
- optional: beans from one vanilla pod or 1 tsp vanilla essence
- 1 Tbsp baking powder
- 1/2 tsp baking soda
- 1/2 tsp salt
- 1 Tbsp vinegar
- 1/3 cup / 75g unsweetened applesauce
- 1/3 cup/ 75 ml milk
- 1 cup/ 240 ml water

1. Preheat your oven to 175 °C/350 °F.
2. Make the crumb: Work together flour, cinnamon, butter and sugar until a dough forms. Tear apart or work it into a crumble with a fork, set aside.
3. Make the cake batter: In a medium sized bowl mix together the polenta, the flour, the sugar, the honey, the vanilla, baking powder and soda and the salt. Now add vinegar, applesauce, milk and water on top and stir together until just combined.
4. Grease or line your cake tin with parchment paper. Pour the batter inside, add the crumb on top and bake for 40-60 minutes until a skewer inserted comes out clean.
5. Take the cake out, let it cool in the pan for 10 minutes, then remove and let sit for further cooling. Cake freezes easily or even tastes better the next day. Enjoy!

Saturday, 8 February 2014

Individual Marbled Cakes with Raspberries, Ricotta and Streusel {perfect for your Valentine}


Okay, let's be honest: I think I live in an area where Valentine's day isn't this popular (huh, the truth is out!). I know, I know shame on us you may think, but really: we know it exists and some couples are celebrating it but generally spoken the society just doesn't seem to hop on the whole commercial aspect of it as promoted by several advertisements weeks in advance (like personalized candy shells with your partners face on it - yaah, cool idea dude but who really devours in chocolate with your better half's face on it, has kind of an cannibalistic touch, hasn't it?).

I might only guess from what I see on the internet and in this super-duper digital surrounding it seems like the whole rest of the world is suuuper excited about this one day to be 14th February: baking countless desserts filled with hearts in all kinds of shapes and textures (heart shaped bread, cupcakes topped with sprinkles in heart shape just to name a few) and pink and red is everywhere! The pictures of all those decoration work and luscious homemade indulgences have been overflowing all social media sites I know recently.

Not that I mind scrolling through chocolate, chocolate, red sprinkles, pink frosting and even more chocolate (okay, I actually do so when it's post-dinner time and I'm just sitting there with my laptop screen throwing photos of countless chocolate feasts at my face right in front of me - major sweet craving alert!) it just seems foreign - in a good way!