Showing posts with label Breakfast & Brunch. Show all posts

Thursday, 10 September 2015

Fig baked oatmeal (w/ apple and an optional cheesecake layer)

Cinnamon spiced oatmeal with apples, figs and greek yogurt for that extra protein

Cinnamon spiced oatmeal with apples, figs and greek yogurt for that extra protein

I love the bittersweet transition from summer to fall. The last barbecues the very last trips to the market to return with heaps of melons, peaches, nectarines and fresh berries, the first pumpkin soup and a comforting bowl of porridge after a morning run in the crisp air.

It was below 10 °C for the first time this morning and all I could think of while being outside was what kind of warming bowl I could return to when back home.

The heaps of fresh figs on the counter who sat on the counter waiting to be turned into jam and baked into bread just screamed at me. As well as the first-of-the-season apples in the basket underneath. Because I didn't feel quite ready for some porridge yet I decided on a mix of cheesecake and baked oatmeal. Some greek yoghurt, lemon and a touch of maple syrup under spiced oatmeal make a very nice late-summer-early-fall breakfast for two ;-) or three, four, whatever - the recipe adapts easily. Enjoy!

Cinnamon spiced oatmeal with apples, figs and greek yogurt for that extra protein

Cinnamon spiced oatmeal with apples, figs and greek yogurt for that extra protein 

Cinnamon spiced oatmeal with apples, figs and greek yogurt for that extra protein

Fig baked oatmeal
- serves two
- "Cheesecake" layer:
- 250g greek yogurt or curd
- 1 Tbsp flour
- 1 Tbsp maple syrup
- 1 tsp lemon juice
- Oatmeal:
- 60g/ 2/3 cup oats
- 1 tsp cinnamon
- 1/2 grated apple
- 1/2 cup milk
- For the topping:
- 1 fig
- 1/2 apple

1. Preheat your oven to 180 °C. Grease a small deep-dish pan about 20 cm in diameter. 
2. Mix the cheesecake layer ingredients and spread into the pan.
3. Mix the oatmeal ingredients and spread on top of the yogurt. 
4. Wash and cut the fruit into small pieces, assemble on top of the oatmeal.
5. Bake for 20-25 minutes until top is crispy and cheesecake is set. Remove, let cool for 5 minutes, then serve with more fresh fruit, yogurt, milk or maple syrup. Enjoy! 

Cinnamon spiced oatmeal with apples, figs and greek yogurt for that extra protein Cinnamon spiced oatmeal with apples, figs and greek yogurt for that extra protein

Cinnamon spiced oatmeal with apples, figs and greek yogurt for that extra protein Warm oatmeal with milk and fruit

Cinnamon spiced oatmeal with apples, figs and greek yogurt for that extra protein Cinnamon spiced oatmeal with apples, figs and greek yogurt for that extra protein

Sunday, 30 August 2015

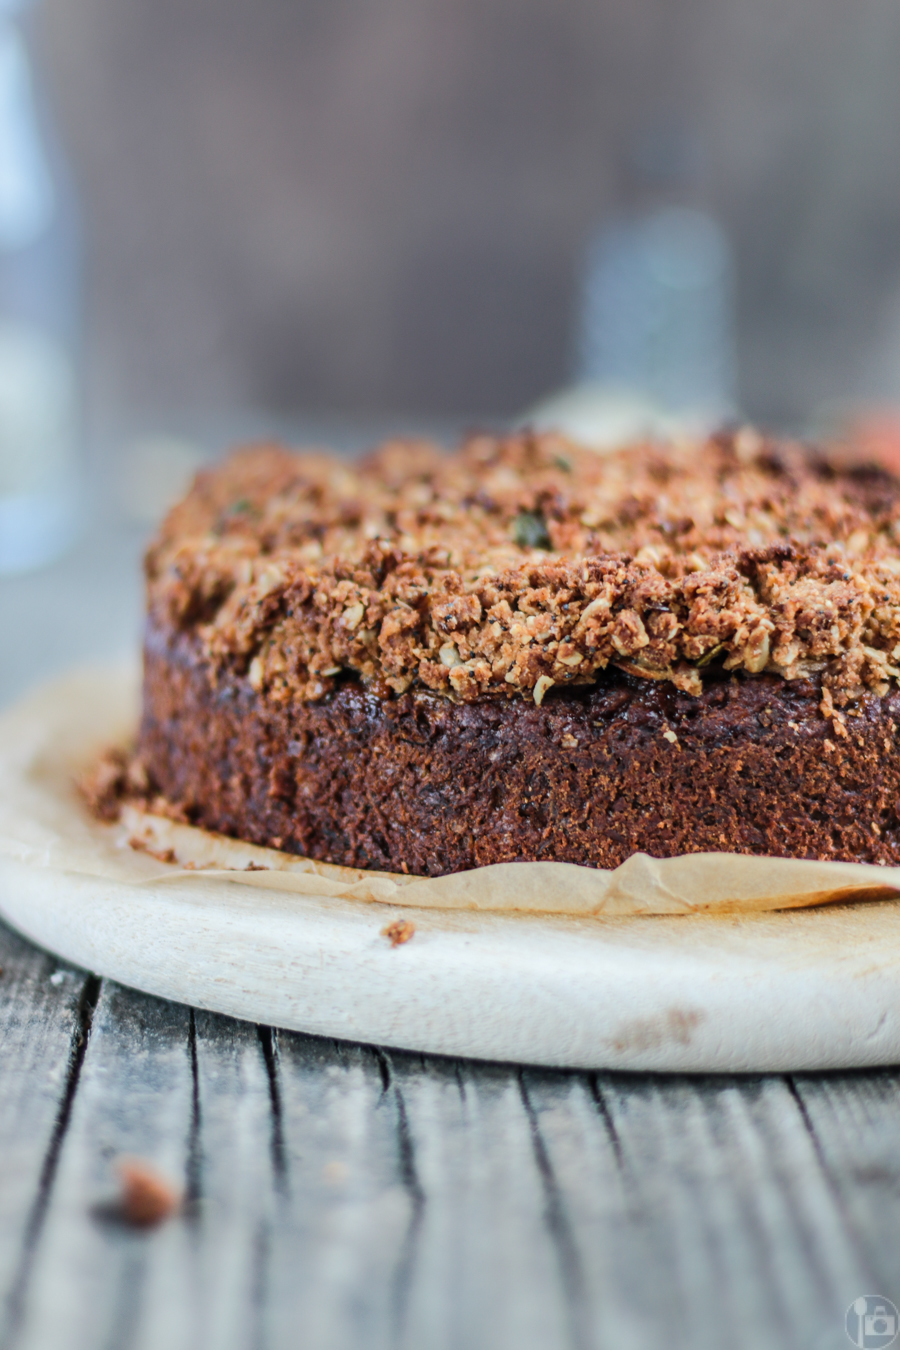
Harvest Cake {w/ zucchini, beetroot, carrot & apple}

Cake with Zucchini, Beetroot, Carrot and Apple - perfect for the Harvest/Thanksgiving season

My arms are becoming really strong lately. And no this isn't thanks to some super secret training method which transforms you into a human version of the incredible "Hulk"overnight but rather because of all the fresh vegetables our allotment harvest brings us. Zucchini, potatoes, herbs, beetroot, carrots, spinach, beans, pumpkins - you can almost see the crops growing. Our vegetable box is overflowing from all the goodness and even with the combined "eating powers" of friends and family it seems like we can't conquer the masses of fresh produce ;-). So as every year it's veggies 24/7 - no complaints - zucchini pancakes are a great breakfast btw.

Cake with Zucchini, Beetroot, Carrot and Apple - perfect for the Harvest/Thanksgiving seasonCake with Zucchini, Beetroot, Carrot and Apple - perfect for the Harvest/Thanksgiving season

It's kind of a tradition for me to bake a cake or bread with some of the fresh produce (e.g. this Zucchini and Thyme Bread  or these baked Beetroot Chips) and this year I just combined a bit of everything: zucchini, beetroot, carrots plus apples, a hint of cinnamon and the usual suspects flour, fat, salt etc. plus crumble - you can't go wrong with crumbles.

Cake with Zucchini, Beetroot, Carrot and Apple - perfect for the Harvest/Thanksgiving season

Wednesday, 26 August 2015

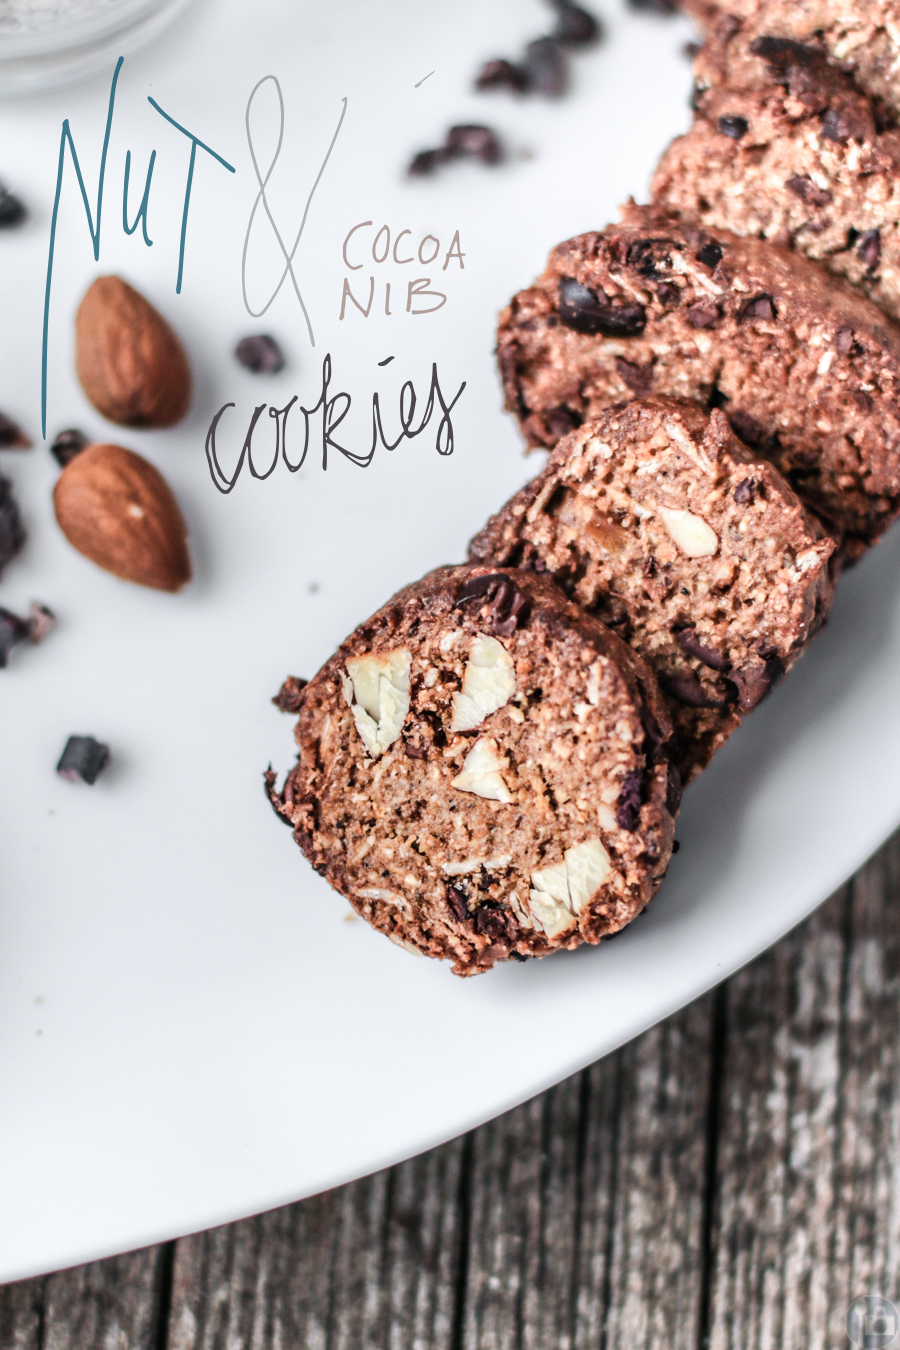
Nut & Cocoa Nib Cookies

Nut & Cocoa Nib Cookies

So I'm a serious cookie lover. As a child I couldn't get enough of soft, chewy super sweet Chocolate Chip Cookies. Serve them with a glass of milk and I was more then happy. Nowadays I am a bit more aware of nutritional values and prefer wholesome nutritious alternatives to cookies as an afternoon-snack. Yet every now and then a cookie craving hits. I always have a tea or coffee in the afternoon and finding a good cookie that combines all the points on my list (nutritional value, taste, ability to be dunked without falling apart, yet no brick texture) it's a very serious business. :-) 

Nut & Cocoa Nib Cookies

Monday, 24 August 2015

Rhubarb & Hazelnut Upside Down Cake

Vegan Cake Crumbs

Current mood: bucketloads of good coffee in the morning or whole pints of English Breakfast w/ milk in the afternoon... and warm cake, biscuits, muffins or anything freshly baked and wholesome-ly sweet. Pre-autumn blues? Maybe.. rainy and grey german weather? Definitely.

Rhubarb & Hazelnut Upside-down Cake

Clouds, white clouds, grey clouds, dark clouds, small clouds and the sun - they seem to be playing catch me if you can on the canvas of the sky. The current breeze will change into a strong wind short before you notice. And as soon as I'm ready to wave goodbye to Summer and wipe the dust off my boots and sweaters the forgotten summer sun rays break through again - humidity, warmth, heat and short shorts all over again. Sounds like April heh? So to keep a bit of these end-of-summer-but-could-be-spring feels I've mixed some colorful end-of-the-season-rhubarb with a few nuts - fresh and wholesome yet perfect with a huge mug of tea instead of an iced latte. Enjoy these pre-autumn days!

Rhubarb & Hazelnut Upside-down CakeRhubarb & Hazelnut Upside-down Cake

Rhubarb & Hazelnut Upside-down Cake

 Rhubarb & Hazelnut Upside-down Cake
- makes one regular sized loaf cake, double the amount for a measurements for a regular-sized springform pan
- 200g fresh or thawed rhubarb, peeled and cut into large chunks (max. 2 inch long)
- a handful of Hazelnuts, blanched
- 150g natural full-fat Yoghurt (3.5%), or non-dairy if necessary
- 60g plus 2 Tbsp coconut oil, alternatively use butter or vegan spread
- 90g plus 5 Tbsp Honey
- 1 tsp Cinnamon
- 1/2 tsp Salt
- 1 tsp Vanilla
- 220g flour (I used whole spelt, but all-purpose or whole wheat works equally fine)
- 1 and 1/2 tsp baking soda
- 1/2 Tbsp white vinegar
- 60 ml milk, use non-dairy if necessary

1. Mix the rhubarb with 3 Tbsp honey and heat in a small saucepan until slightly softened while interior is still firm. Alternatively heat it in a covered bowl in the microwave for 2:30 minutes on high-heat.
2. Pre-heat your oven to 175°C. Toast your hazelnuts on a baking sheet for 10 minutes until slightly browned. Meanwhile beat the yoghurt, 60g coconut oil and 90g honey on high for two minutes. In a separate bowl mix all dry ingredients. Pour vinegar and milk over the batter and lift in the dry ingredients briefly until just combined.
3. Melt the remaining 2 Tbsp Coconut Oil, mix it with the honey and spread that onto the bottom of your pan. Drain the rhubarb and put it into the bottom of the pan. Sprinkle the hazelnuts on top and cover with the batter.
4. Bake for 30-40 minutes until a skewer inserted comes out clean. Enjoy!

Rhubarb & Hazelnut Upside-down Cake Close Up


Thursday, 13 August 2015

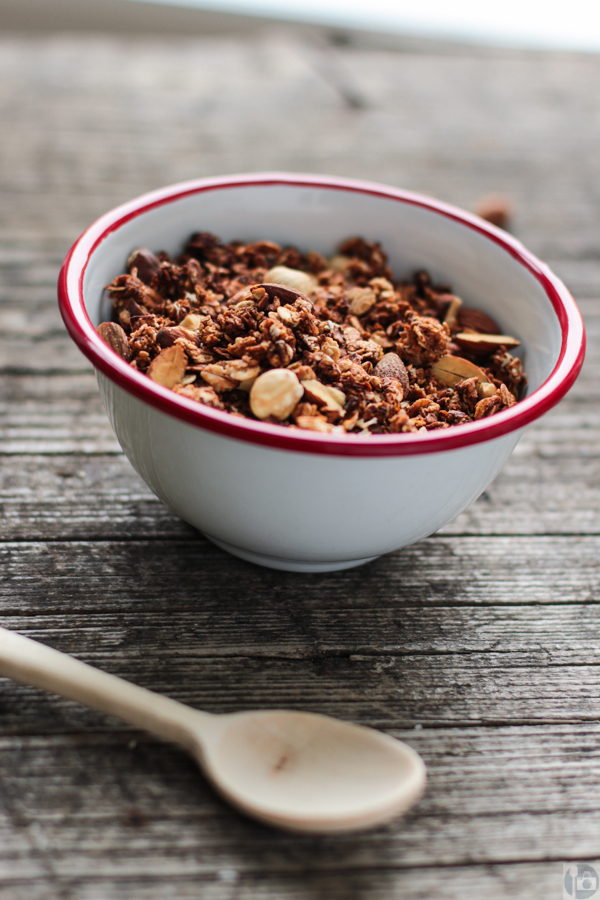
Apple Cinnamon Granola

Gluten free Apple Cinnamon Granola

Good morning! Or good evening, lunch-time, afternoon, night.. (wherever you are). I'm currently experiencing the luxurious problem of a vacation hang over, this kind of feeling like being trapped in a dream which doesn't have to be bad but all you really want to do is wake up and get back to the named vacation place... Croatia has been magical and after a fair share of sun, sea, relaxing etc. it's back to work now: university preparations (paperwork, finding an apartment/room, moving....).

Gf, vegan, low fat Granola

Nuts for Granola

So yes exciting weeks lie ahead! I always cherish breakfast (as you may now by the amount of breakfast pictures on my instagram..) but when times are rushed it becomes a rare occasion to have enough time for artistically prepared breakfast bowls and plates with loads of variety from day to day. That's the point where I get excited to have a good homemade granola as a back up. So today I've got the recipe for an extra-luscious Apple-Cinnamon Granola. In-season Apples unite with a touch of Cinnamon, giving a hint for the upcoming autumn yet a coconut accent keeps it all summery. No butter, eggs or sugar were harmed in the process so it's vegan, refined-sugar free, gluten free and all natural!

Vegan Apple Cinnamon Granola

I love to make big batches as my sister and I have developed an incredible speed for making granola disappear so we always opt for double batches which will keep us going for about 2-3 weeks. In general one batch should be enough ;-) great enjoyed plain with milk of choice and fruit or get creative and layer it in parfaits, top smoothie bowls with it or grab a naughty handful of it as a snack.. ;-) Enjoy!

Apple Cinnamon Granola

Breakfast is sorted: Apple Cinnamon Granola

Apple Cinnamon Granola
- 2 apples, washed, cored and cut into large chunks
- 1 Tbsp Cinnamon
- 2 Tbsp Coconut Oil
- 5 dates (Medjool or Deglet Nour), pitted
- 100g shredded coconut
- 500g oats (use gluten free if needed)
- 150g mixed nuts (I used walnuts, pecans, cashews, almonds and hazelnuts)

1. Preheat your oven to 175°C. Heat the apples on the stovetop and cook on medium heat for 5 minutes, then add the dates and cook for 5 more minutes until soft. Take off the heat.
2. Combine at the oats and the cinnamon. Blend the apple and date mixture with a blender or kitchen machine until smooth. Mix in the oats and oil. 
3. Spread onto parchment lined baking sheets. Use a fork to loosen up large chunks. Bake for 10 minutes. Meanwhile toast the nuts in a pan, stirring occasionally until browned. Remove and let cool. Chop the nuts or leave them whole.
4. After ten minutes give the granola a good stir and return to the oven for an additional 15 minutes. 
5. Stir again and add the coconut. Continue baking until coconut is toasted and granola is lightly browned and crispy. Remove from the oven, stir in the nuts and let cool completely.
6. Once cooled keep your granola in an airtight container. Keeps for about 2-3 weeks (or even longer, depending on your granola consume). Enjoy!

Friday, 31 July 2015

Blackberry Spelt Buns

Blackberry Whole Spelt Buns


Hey, how's everyone doing? The past few weeks for me were like... WOW! I expected some time to unwind, sleep in, cook, bake and get creative in- and outside of the kitchen, meet friends, catch up with relatives and just get some university applications done on the side...

Blackberry Whole Spelt Buns
 Instead it turned all upside down, and always out the other way round.. The german post strike w/ university applications almost not reaching their destination, re-organizing my room (and I always thought my sister doesn't even like my clothes.. wishful thinking!!), running more errands in a week than I thought were possible and of course seeing more trains from the inside than daylight hours outside. If I was lucky enough I only had to pack my backpack every few days and being at home four days a week felt like a win because it meant I was home the majority of the week. A lot of visits and university test travels later (plus a short sweet weekend in Milan :) ) I'm now ready for some serious relaxed sunny summer days. Two weeks on holiday until the whole "circus" will go back to business as usual :D.

Blackberry Spelt BunsBlackberry Spelt Buns

But I won't leave you empty handed! The german heat and humidity was just perfect for some yeasted dough: spelt meets sun-kissed wild blackberries. It's basically just mix, quick knead, rise, heat, mix and cool down the blackberries, assemble, bake and enjoy - 2 hours in total yet just about 20 minutes hands on time max. The super sweet in season berries charm the wholesome soft spelt dough like a needed finishing touch. It tastes like an upgraded version of a blackberry jam sandwich yet with a lot more flavor and natural goodness packed inside. A sweet breakfast treat, mid-day or afternoon snack. So you can rock those summer days! Or act like a magic super hero and pull some out of your picnic box on your way to were ever these weeks may lead you.. Enjoy!


Blueberry Spelt Buns
makes six 
- 300g whole spelt flour plus more for dusting
- 2 tsp dried yeast
- 150 ml warm tap water
- 2 Tbsp honey
- 1 Tbsp coconut oil
- 1 Tbsp nut butter
- 1 tsp cinnamon
- 1/2 tsp nutmeg
- 1/2 tsp salt
- 120g fresh or thawed blackberries
- 3 Tbsp coconut sugar, honey or other natural sweetener

1. Mix the yeast, water, 2 Tbsp honey, coconut oil and nut butter. Whisk until well combined. In a medium mix the flour, spices and salt then stir in the yeast mix. Knead for 5 minutes until a soft dough ball forms and cleans the bowl. Cover with a tea towel and let rise for 1-1.5 h or until doubled in size.


2. Preheat your oven. Lightly flour your working surface. Divide dough into six pieces. Roll each into a ball between your palms and press slightly to flatten. Put the formed buns onto a greased or parchment lined baking sheet.

3. Heat your blackberries in a small saucepan, stir in the coconut sugar. Keep it on low heat for three minutes. Using the back of a spoon press a small hollow into each bun. Spoon the blackberries into the hollows. Cover the sheet with cling film and let the buns rise for 20 minutes. Unwrap and bake in the oven for 12-15 minutes until lightly browned and bottom sounds hollow when tapped. Remove from the oven. Allow to cool for five minutes before serving. They taste great with a dollop of natural (greek) yoghurt or some extra honey drizzled on top. Enjoy!


Ingredient flatlay


Monday, 13 July 2015

Cherry Tart with mixed Nut Frangipane


"Hallihallo!" Soo, I'm back from my year in London and oh dear it was fuuuun!! Magic city, cool markets, great people... But let's keep that on another note - there will be a detailed post with all experiences, tips etc. coming soon. For now: Cherry Frangipane Tart.


Refined sugar free Cherry and mixed Nuts Frangipane Tart to be exact. We bought 2 kgs cherries yesterday - dark red, juicy, ripe goodies who just seemed to scream at me from their place in the fridge. 20 minutes later some of them were resting atop a smooth frangipane wrapped in a crunchy crust in the hot oven. 30 minutes later the alarm goes off and the tart was transferred into a cooler environment on the countertop. 15 minutes of further patience testing aka cooling time. Then the tart was cut and devoured right from the pan - an edible taste of summer! As civilized human beings do we laid the table, tablecloth, dishes, cups, forks and all necessities, sat down and enjoyed a taste of summer.


Print Recipe
Cherry Frangipane Tart                           
- makes one 8 inch/20 cm tart, serves 6
For the crust:
- 200g flour
- 120g coconut oil
- 3 Tbsp honey or agave syrup
- 1 tsp salt


For the franigpane
- 120g mixed nuts, ground- 2 eggs, can be substituted with flax eggs (4 Tbsp flax seed meal mixed with 5 Tbsp water)- 60g flour, I used white spelt flour- 80g honey or agave syrup for a vegan version- 40g butter or coconut oil/plant based spread if you follow the vegan version
- 130g fresh Cherries, pitted and halved (equals 150g fresh, unpitted cherries) or canned, drained and mixed with   1 Tbsp flour
  1. Prepare the crust: mix all ingredients together until a smooth dough forms. Wrap in cling film and leave in the fridge while you prepare the filling.
  2. Frangipane filling: Beat together the butter/coconut oil and honey for about 2 minutes until pale and fluffy. Add in the eggs or flax eggs, one at a time, beating well after each addition. Fold in the ground nuts and the flour.
  3. Grease and flour a 8 inch/ 20 cm tart pan. Take the crust out of the fridge and press into the prepared pan. Prick with a fork a couple of times and bake it in the oven for 10 minutes until slightly browned.
  4. Pour the frangipane batter into the crust. Assemble the cherries on top, the cut side facing upwards.
  5. Bake for 30 minutes until slightly browned.
  6. Remove from the oven, let cool for 15 minutes before removing the pan. Enjoy! Great served with creme fraiche or greek yoghurt!


Friday, 3 July 2015

Strawberry 'n' Crumb Buns

Breakfast Buns filled with Strawberries

One thing I'll miss out due to my time in London is my family's annual strawberry-picking-and-jam-making-marathon.. My grandma's birthday is in the middle of June and as they have got a pick your own field close by every birthday visit wouldn't be complete without picking at least 6 lbs of fresh, ripe, red, flavour bursting strawberries, driving them all the 200km way home and then finishing the day off by cooking countless glasses of gloriously bright red and flavoursome jam. No question that the plamned evening salad always ALWAYS gets replaced by a proper slice of toasted bread, good butter and the still warm strawb jam. Or two, maybe three or even.. Well lets leave it at that. 

This year I faithfully leave the jam making duty to my family and enjoy punnets full of british strawberries instead. I can't complain!

Breakfast Buns with Strawberries


Sunday, 26 April 2015

Banana Bread


Healthy refined sugar free Banana Bread


Hey lovely people out there - I hope you're all doing mighty fine with some gorgeous spring weather in the northern hemisphere or a golden autumn in the southern hemisphere right now! Wherever you are I hope the weather is just on point for some lovely picnics and outside breakfast/brunch sessions. Let's say I've been out and about for picnic dates at least twice every week recently, double the number and you can get an approximate idea of how much sun spoiled us Londoners in the past weeks - bring it on spring!

Banana Bread illustrated Recipe

Picnics call for easy, convenient fresh recipes, like this Bulgur Salad or some small snacks. And if you decide on an impromptu one, how about bringing along a loaf of freshly baked banana bread? Skip the sugar and highly-processed ingredients of the store bought version and reach into your cupboard instead!

I almost feel ashamed about hiding this banana bread recipe from your eyes for a whole year!! It's easy, quick and requires just a few pantry staple ingredients: some flour of choice (I used whole spelt), salt, yoghurt, milk, baking soda and vinegar. Make it vegan by substituting non-dairy alternatives and throw in some natural sweetener of choice and maybe some nuts, seeds or dried fruit (I used pecans) and you're all ready to go. Stir, pour and bake. And how about filling your basket with some more homemade good stuff and maybe a few favourite toppings for your banana bread before taking it out of the oven, wrapping it up (don't forget a knife to cut the slices!) and heading out of the door?

The bread is full of banana flavour, incredibely soft and airy and without the usual sugar rush. I recommend doubling the amount of sweetener if you have a sweet tooth, for me it worked fine with just one tablespoon honey. I wish you all some glorious spring/autumn days!!

Naturally sweetened Banana Bread Banana Bread
- makes one half pound-ish loaf
- 360g flour of choice (I used whole spelt, but feel free to grab whatever is left in your pantry: oat flour, whole wheat, rye, buckwheat...)
- 1 and 1/2 tsp salt
- 1 and 1/2 tsp baking soda
- 160 ml milk
- 120g yoghurt
- 2 bananas, mashed
- 3 Tbsp vinegar
- 1-3 Tbsp liquid sweetener of choice, I used honey

1. Preheat your oven to 200 °C.
2. Mix dry and wet ingredients seperately - add the wet mixture to the dry one, stir until just combined.
3. Pour batter into a regular sized loaf pan lined with parchment paper or greased with some oil.
4. Bake for 45 minutes up to 1 hour. The bread is done if the bottom sounds hollow when tapped or a skewer inserted comes out clean. Remove and let cool for at least 10 minutes, then remove from the pan and allow for further cooling or serve immediately. Enjoy!


Friday, 3 October 2014

Pear & Double Almond Upside Down Cake {One year blogiversary}


Okay, so a year ago today I spontaneously decided to finally listen to my mom's advice  (yes, there's a lot of truth behind that saying suggesting that moms are always right, even when that can be hard to accept sometimes... Just kiddin' - love you mom!) and finally started a food blog. Random site note: I did this a day before an important exam, yep that's right, should have been studying, nevertheless got that really good grade in the end - take time for what you love, happiness is key, lesson learned! Last year's third of october was a moody rainy day in Germany - perfect for this loaf shaped Zebra cake! During the year you might have noticed my love for streusel/crumbs and upside down cakes (an addiction that I just got to through blogging) - if you're a first time visitor then feel free to take a glance at the blog's recipe index and you'll possibly agree with me! I decided to stick to the tradition and the essentials so today there's a cinnamon spiced pear upside down cake with a whole lot of caramellized almonds on top - all those autumn flavours packed into one piece of cake!


But back to the story, because birthdays make me nostalgic - I basically spent the whole day working on that blog design, layout etc. to have it up and running within a couple of hours (screw those characterisations and stuff that should've got in my head..) Going for color or black and white in the design seemed like the most important question to be answered :-P. In the end I settled for a colorful one - which got changed from orange/yellow to blue/grey/yellow during the last 365 days! 


Oh and what an adventure those have been! My personal life got turned complitely upside down: graduating high school, a lot of adventurous travels and now I'm sitting in my bed in the big capital of the UK, ready to fill up the next 365 days of blogging with trumendous stories from my Au pair year and of course: food. All the food - 'cause that's why you are here for! Summary: happy Birthday A Spoonful of Photography - thanks for being my creative outlet and thanks to/for all those amazing people that i was able to meet online through you during this year, the ones who support me and the ones who i would call a friend already! Cheers or moreover happy cake devouring!

Pear & Double Almond Upside Down Cake with caramellized Honey Almonds
-makes one regular loaf sized cake
- For the Pear layer:
- 2 medium sized pears
- 4 Tbsp butter
- 3 Tbsp brown sugar
- 2 tsp cinnamon

- For the crumbs:
- 60g butter
- 120g flour
- 35g sugar

- For the cake
- 100g butter
- 80g brown sugar
- 2 eggs
- 3 Tbsp honey (may be substituted with three heaping Tbsp of white sugar)
- 1/2 tsp salt
- 1/2 tsp baking soda
- 1 tsp baking powder
- 3 Tbsp ground cinnamon
- 200g flour (I used Whole wheat)
- 170g ground almonds
- up to 100 ml milk
- 1 Tbsp white vinegar

For the caramellized honey almond topping:
- 80g whole almonds, blanched if you prefer that
- 30g brown sugar
- 1 Tbsp honey
- optional (even though highly recommended!): 1/2 tsp salt, 1 tsp cinnamon


1. Preheat the oven to 175/350.
2. Prepare the pear layer: melt the butter and grease a regular sized loaf tin with it. Mix together the brown sugar and cinnamon and dust the bottom and sides of the pan.
3. Wash and slice two pears as thinly as possible (you should be almost able to look through them) layer the slices upside down in the pan so they'll be right side up again once the cake get's inverted.
4. Prepare the crumbs: work together the butter, sugar and flour until a dough starts to come together, loose it with a fork into fine crumbs and set aside.
5.Prepare the cake batter: In a medium sized bowl beat together the  butter and brown sugar for about 2 minutes until creamy.  Seperate one egg. Add in the remaining egg, plus the egg yolk to the butter-sugar mixture and beat throughoutly.
6. In a seperate bowl mix the flour, cinnamon, baking soda and salt. Divide the butter mixture into three equal parts, briefly lift in the flour mixture into two of the butter parts, do the same with the ground almonds and the remaining butter part. Divide the milk amongst the two batters, you might need a little more until you've got a rather thick consistency which is supposed to ribbon off the spatula. Beat the egg white until stiff peaks form and fold it into the almond dough.
7. Pour half of the flour batter on top of the prepared pears. Press down the middle a bit and fill it with the almond batter, then cover it with the remaining flour batter. Bake for 45-60 minutes, until a skewer or cake tester inserted cones out clean.
8. Remove from the oven and let cool for 10 minutes, then carefully run a knife arount the edges to loosen the cake (use a sharp and thin blade to not destroy the pears). Invert on to a plate and remove the pan. Let cool for a further 15-20 minutes.
9. After the further cooling prepare the honey almond topping: put the whole almonds into a pan and roast them for 2-3 minutes on medium high heat until slightly browned. Then add in the sugar and honey, reduce stirring to a minimum until the sugar has caramellized (this will take about 3 minutes on medium high heat), in the last second stir in the cinnamon. Pour on top of the cake, carefully seperate the almonds with a fork, to allow for easier cake cutting later. Let sit for 5 minutes, then either serve immediately or keep it in the refrigerator for up to 3 days wrapped in aluminium foil. Enjoy!